Professional cooktop installation can set you back $500. This adds much to your appliance costs.
Our team has installed countless 30 inch electric cooktops, and here's what we know: you can handle this project yourself in just a few hours with proper guidance. A sleek 30 inch induction cooktop or a traditional model needs the right installation. This is a vital step for safety and performance.
Our tested step-by-step process will guide you through your cooktop installation. The process covers everything from precise measurements to final testing. You can tackle this project confidently and change your kitchen without spending too much!
Pre-Installation Planning
Let's make sure you have the right electrical setup for your 30 inch electric cooktop. Your kitchen needs a dedicated 240-volt circuit with a 40-amp breaker. You'll also need a junction box rated for at least 240 volts.
Here's everything in clearance requirements for safe installation:
- Minimum 30 inches between cooktop and overhead cabinets
- At least 1 foot of clearance on each side
- 8 inches of counter space on at least one side for utensils
You need to get the right permits before starting any work. An electrical permit is required for most installations, and fees typically range from $50 to $500 based on your location and project size.
These tools will help you complete a smooth installation:
- Pipe wrench
- Pliers
- Tape measure
- Power tester
- Screwdriver
Your cabinets and wall coverings must handle temperatures up to 200°F. Safety is vital, so turn off the power at the fuse box and use a circuit tester to confirm power disconnection.
Taking photos of the existing wiring configuration is a great way to get reference during the new installation. The whole ordeal typically takes between one to two hours when replacing an existing cooktop of the same size.
Quick Installation Method
You'll need a helper to install your 30 inch electric cooktop since these units are quite heavy to handle alone.
Here's our proven installation process:
-
Disconnect power and remove the old cooktop. The photos of the existing wiring are a great way to get reference later.
-
Clean the countertop opening well. Line the inside edges with reflective foil tape to prevent heat damage.
-
Place the new cooktop upside down on a protected surface. Attach the spring clips that will hold it in place.
-
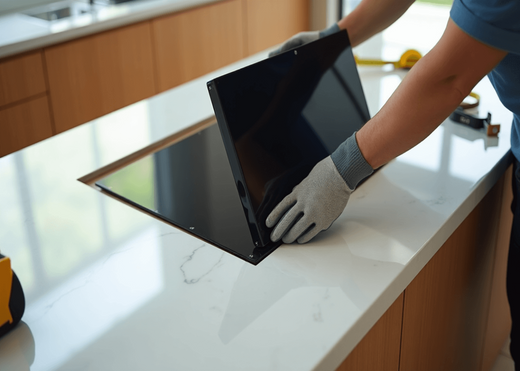
Get your helper and lower the cooktop into the opening together. Feed all wiring through first, then angle the back end down.
The cooktop needs proper securing once positioned. Your model might need foam tape on the underside edges if it has a glass burner plate. This creates a stable, secure fit.
Those photos we took earlier will guide the electrical connection. Connect each wire to its corresponding terminal and secure them with cable nuts. Always double-check these connections for safety.
Test everything properly at the end. Each burner should be tested to ensure it works correctly. Cut power immediately and recheck the connections if you spot any problems.
This whole ordeal usually takes one to two hours. Add a bead of silicone sealant around the edges to create a waterproof seal.
Finishing and Testing
The physical installation of your 30 inch electric cooktop is complete. Safety testing plays a significant role in ensuring everything works perfectly.
These safety checks will get you started:
- Test all electrical connections with a circuit tester
- Verify that the cooktop sits firmly in place without movement
- Check all burners for proper operation
- Inspect the control panel and display functionality
We should also get into whether the cooktop is properly secured to your counter. Important safety note: The unit needs additional securing if you notice any movement or wiggling.
Test performance by turning on each burner individually. Your 30 inch electric cooktop should heat evenly and respond quickly when you adjust temperatures. All control switches should function correctly - a faulty infinite switch might be causing any temperature regulation problems.
Power should be disconnected immediately and professional help sought if you notice:
- Sparks from the heating elements
- Control displays not functioning properly
- Burners heating to incorrect temperatures
Safety checks should be done every six months. Electric cooktops typically last about 13 years when managed to keep properly. Regular testing ensures both safety and longevity.
Conclusion
A 30 inch electric cooktop installation may look challenging, but the process is quite straightforward. With proper planning, the right tools, and safety measures, you can complete this project yourself and save hundreds of dollars.
Your safety should be the top priority during installation. Take time to verify electrical connections, ensure proper clearances, and test thoroughly. These basic steps will keep your cooktop running reliably.
Listen to your instincts as you work through the installation. If you run into problems or feel uncertain about the electrical work, don't hesitate to call a professional. A well-installed cooktop becomes your kitchen's centerpiece and can serve you well for more than a decade.
This piece will help strengthen your confidence to install the cooktop yourself. Just follow each step with care and focus on safety. You'll soon be cooking on your new surface without paying those expensive installation fees.

